Let There Be (Natural) Light
It’s all about the light
One of the most defining characteristics of any architectural structure is the way it interacts with light. For architects, the way natural light plays out a structure is an integral design consideration. For home buyers natural ‘brightness’ is universally seen as an appealing quality.
When it comes to pictures, capturing the feel that can only come with natural light can be a photographer’s greatest single challenge. Many interiors, while appearing bright to the eye, can remain quite dark when the camera’s sensor is overwhelmed by the exterior light. This is particularly true in ever-sunny Los Angeles.
The ability to capture light in a controlled and hopefully natural (or if required dramatic) way is any important distinguishing element when qualitatively comparing photographs. Light is what creates depth in a picture and when used effectively creates the mood and feel of the image. But reproducing, or at least interpreting the real life feel in a photograph is no small task. Pointing the camera and clicking the shutter will only work under the most perfect circumstances and that is a rare occasion indeed. Only the greatest camera every created is capable of that kind of image capture. So what is that camera?
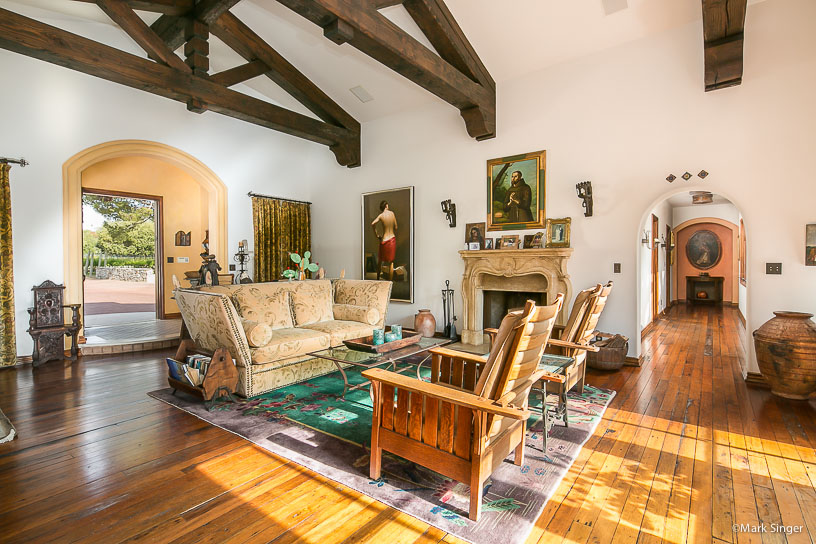
Glorious natural light from the heavens…and 3 strategically placed Canon 600EX-RT speedlites.
Your eye is king of the camera world
Your eye has one hell of a sensor. It is capable of making rapid adjustments to light levels as you look from one place to another so that in all but the most extreme conditions, you can see detail. But if you want to know how a camera sensor feels in a room with varying degrees of light try sitting in a dark room for a while and then suddenly flick on the light with your eyes open. Exactly!
Your eyes feed images to your brain, which has the amazing ability to process a huge dynamic range of light levels all at once without too much of a problem. Cameras aren’t capable of anywhere near the same dynamic range of light. Scenes which look well balanced to your eyes can wreak havoc on a camera’s sensor. Ever taken a picture of someone when there was a bright window behind them without a flash? They come out completely dark because the camera is trying to normalize the bright light flooding in behind them by dropping the exposure. This makes outside the windows look great but leaves your main subject silhouetted and underexposed. And if the camera adjusts the exposure for the main subject, the brighter areas, i.e., outside the window, will be completely blown out.
So, that’s the challenge for all photographers and it’s especially relevant with architectural photography because a given scene can contain so many variations of light and shadow. To combat radical ranges of brightness across a scene and still get a reasonably natural looking result there are several approaches that can be taken. They aren’t mutually exclusive in any way. Often, getting the optimal result is achieved using a combination of them. In practice, depending on the circumstances, post-production can often take as long as on site time.
Let’s take a closer look at the tools have at our disposal.
Supplementary Lighting
Almost all professional photographers that shoot architecture carry a pretty decent selection of lights—both big and small. It’s not uncommon to use as many as 6 or 7 lights to capture a single image; particularly when shooting larger spaces, as is often the case with estate homes and larger architectural volumes.
Introducing supplementary light requires not only time and expense but also attention to detail. The main purpose of the lights is to lift shadows in the scene so that they are captured in greater detail, and also, particularly when exterior views are important, to elevate the interior levels so that the camera has a better chance of capturing both the interior and exterior with reasonable results.
Maintaining natural looking results while using supplementary lighting requires patience because if you rush it or just pop off some massive nuclear blast of a flash, you’ll find you’ve created harsh unexplainable shadows, an overall flat look and color casts from mixing different light temperatures that may have a distracting effect. Of course, I haven’t even mentioned the chaos that flashes can create in terms of reflections!Hearing a client say “I love that you don’t use flash in your photography” is music to my ears.
Worth noting is the fact that even when natural light levels are sufficient for photography, flash is still a valuable tool because its subtle use can enhance color and contrast in the shot, or as some people call it, pop.
Time of Day
Time of day affects several aspects of light; intensity, color, direction and by extension, shadows. It doesn’t take genius to make your pictures look like they were shot at what is often called ‘the golden hour’. It takes being there at the golden hour. It’s just the best time of day. Although the benefits of shooting during the golden hour are most obvious when shooting those luscious golden exteriors with deeper blue skies, it’s also helps in that that the closer to either the morning or evening golden hour we are, the lower the difference between interior and exterior light levels. That means more of the scene can be photographed using more of the natural light. However, particularly when it comes to real estate shoots, budgets and scheduling pressures mean that more often than not, we don’t have the luxury of shooting each room at the optimal time of day. For this reason, time of day may help some pictures on a shoot but not all of them. Other shots still need assistance from other tools in our toolbox.
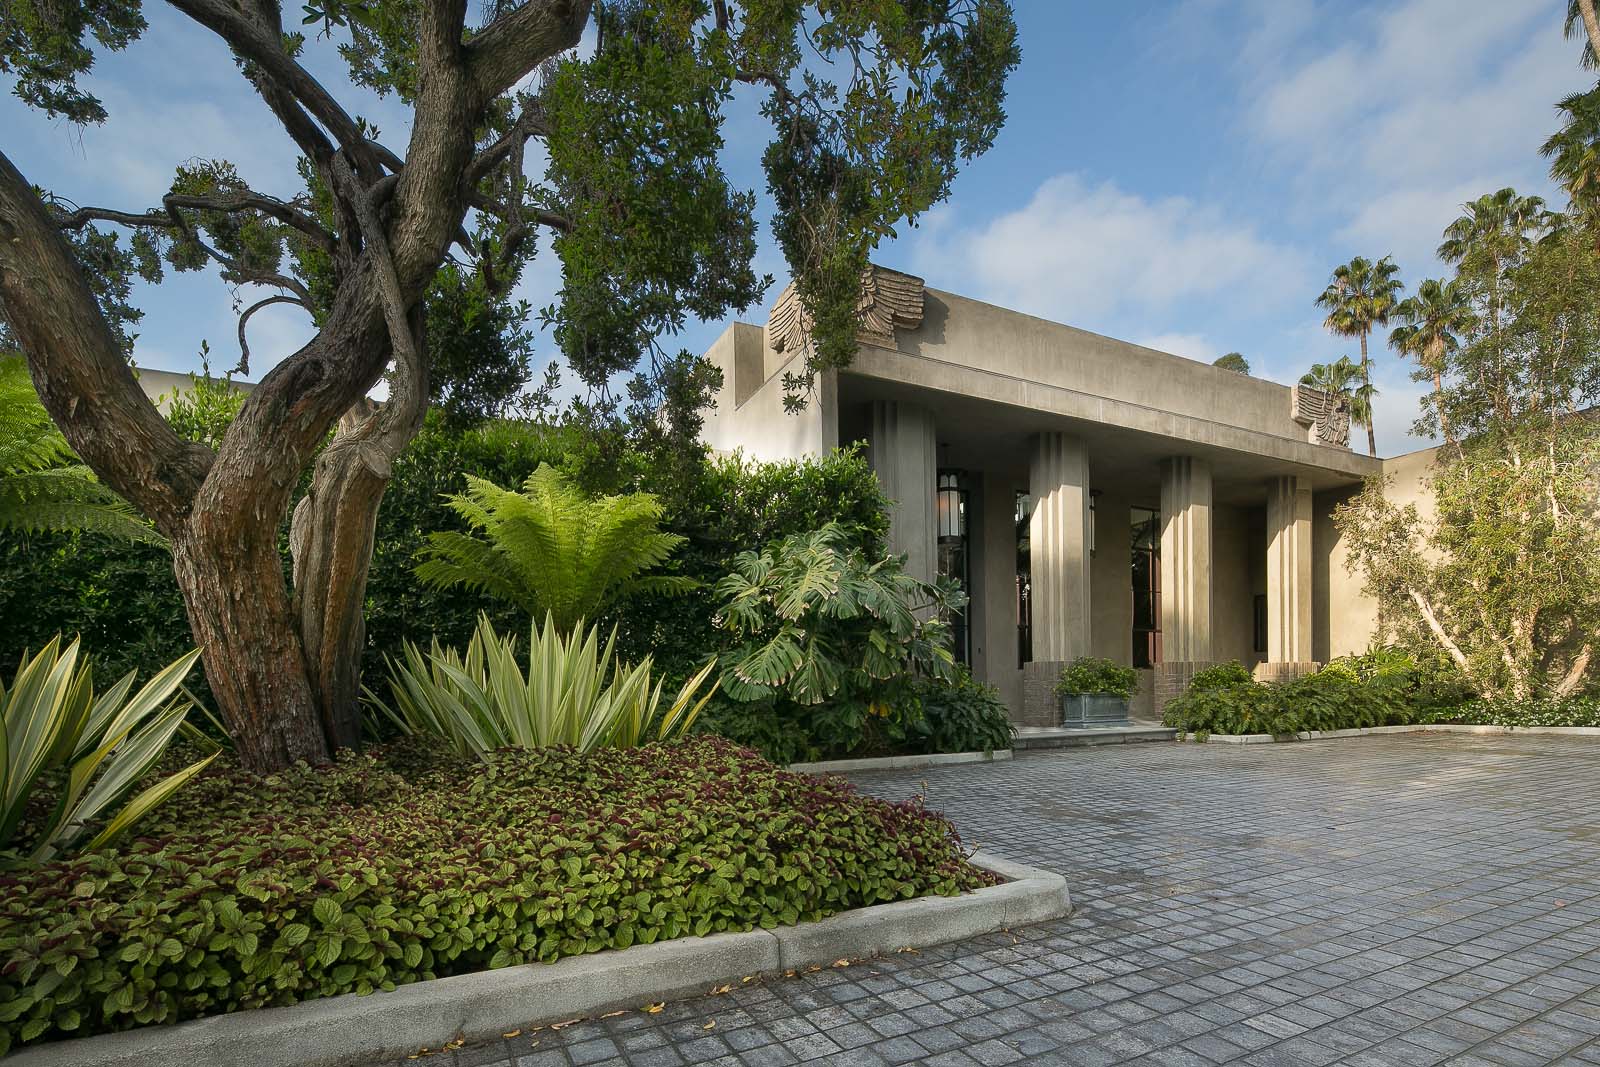
The front of the The Reserve in Holmby Hills. This shot simply wasn’t possible at the first shoot in November due to it’s North facing orientation.
Finally, it’s worth pointing out that the orientation of the building is also an important factor is knowing how the light fall on it. Last year I shot The Reserve, a spectacular 10,000 square foot estate with a north facing front portal. The shoot was scheduled for late fall. Maybe it’s because I wasn’t paying attention at school, but I have no idea how to change the axis of the earth’s rotation for my own purposes and no amount of wishful thinking was going to get decent daytime light on the front portal of the home. The sun simply didn’t get there at that time of year. The solution that carried us over at the time was simply to use only images shot near and at twilight. I went back several months later when finally, for a few glorious minutes in the morning at least, the front facade got a few licks of golden light (see above).
Post-Production
Post-product refers to adjustments made to a picture after it has been captured. And no, it’s not cheating. It’s been going on since way back when photographers used dodging and burning in the darkroom to make various adjustments to an image during the printing process. Even Ansel Adams did it! With digital photography, post-production offers even more flexibility in what can be achieved after the shoot although it’s important to remember, no matter what, that the better the quality of the original frame captures, the better the end result. Still, it’s quite common to spend as much time on post-production as on the actual shoot.
While post-production can be used to remove unwanted elements in a picture, straighten horizontal and vertical lines, or make other types of image adjustments, the most important work from an image quality perspective is in overall exposure adjustments. This usually involves either adjusting localized changes to a single frame, or by layering and blending together the best parts of multiple frames, each of which reveal details form a part of a range of different levels of exposures. Darker exposures tend to capture the lighter parts of the scene with more detail while dark parts become almost black. Lighter exposures capture darker parts of the scene better, but may burn out in the brighter parts. By combining the best parts of more than one frame, we try and better emulate what the human eye sees.
Doing this kind of work can be quite labor intensive, depending on the conditions at the time of shooting. It’s this kind of attention to details that can often breathe real life into an image and is achieved using a combination of automated and manual processes. Between the post-process work, and taking the time to light the scene so that the photographer has the right selection of frames to choose from, it all takes time—time that has to be paid for and that’s just one of the reasons why different photographers charge different prices and yield different results even when shooting under the same set of circumstances.
A word about HDR
If you have an iPhone you may have seen the camera app has an HDR option. It stands for High Dynamic Range. This is essentially an automated and less subtle version of post-processing that combines 3 quick exposures and automatically tries to take the best of each of them. Some photographers use this as their main approach and don’t even use additional lights. Many photographers, particularly those that charge at the lower end of the scale, will use as much automation as possible to keep their costs down. Sometimes its done in-camera and often, it’s done by software on the computer afterwards. In certain circumstances it can work, but very often when applied without a discriminating eye, the results can look very cartoonish, oversaturated and unappealing. You’ve probably come across images where everything looks unnatural, the walls look a little muddy and contrast seems completely out of sorts with the real world. That’s over-automated HDR and man, can it ever look nasty.
It’s all about the right combination
There’s never a definite right way although there are definitely a lot of definite wrong ways to create photos. Natural looking images are achieved using any possible combination of the above techniques and photographers search endlessly for better and better ways and tools to combine these strategies in a way that improves their results. That’s where experience, dedication and quite frankly, caring about what your hand over to your clients really matters.
Hopefully this article gives some perspective about the thought and consideration that goes into not just taking a picture, but making a picture. It should also give you the ability to shop on value as well as price when selecting a photographer.